Getting started
Grial MCP Server is currently in closed beta. If you haven't received an invitation and would like to participate, please contact us here.
Grial MCP Server is a tool designed to be a bridge between our beautiful templates and MCP-compatible AI agents. You can empower your agents with the Grial MCP tools to manage your Grial apps, add templates to your solution, locate and translate your solution, and manage some extensions that we offer.
Instalation
Grial MCP Server was built to work with any agent that follows the MCP protocol. It implements the full protocol, but currently offers tools only.
Although it works with any agent, during the beta the only way to install it is through IDE extensions. We offer one extension for VS Code and another for Visual Studio.
VSCode
First, install the Grial MCP VS Code extension. If you were invited to the beta by email, you received a .vsix file — use it to install the extension.
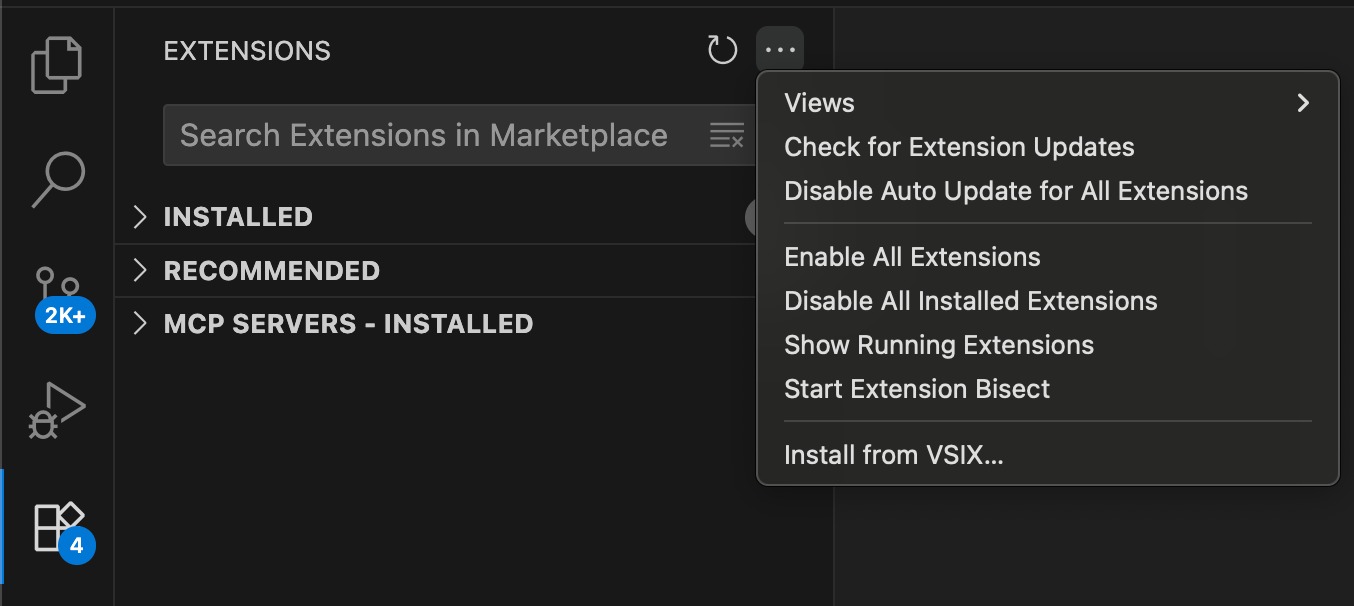
Go to the Extensions tab in the IDE and click the three dots button.
Once the extension is installed you will see a new command in the Command Palette: Grial: Add Local MCP Server.
This command will create the .vscode folder if it doesn't exist and the mcp.json file. Inside mcp.json, it will register the Grial MCP server.
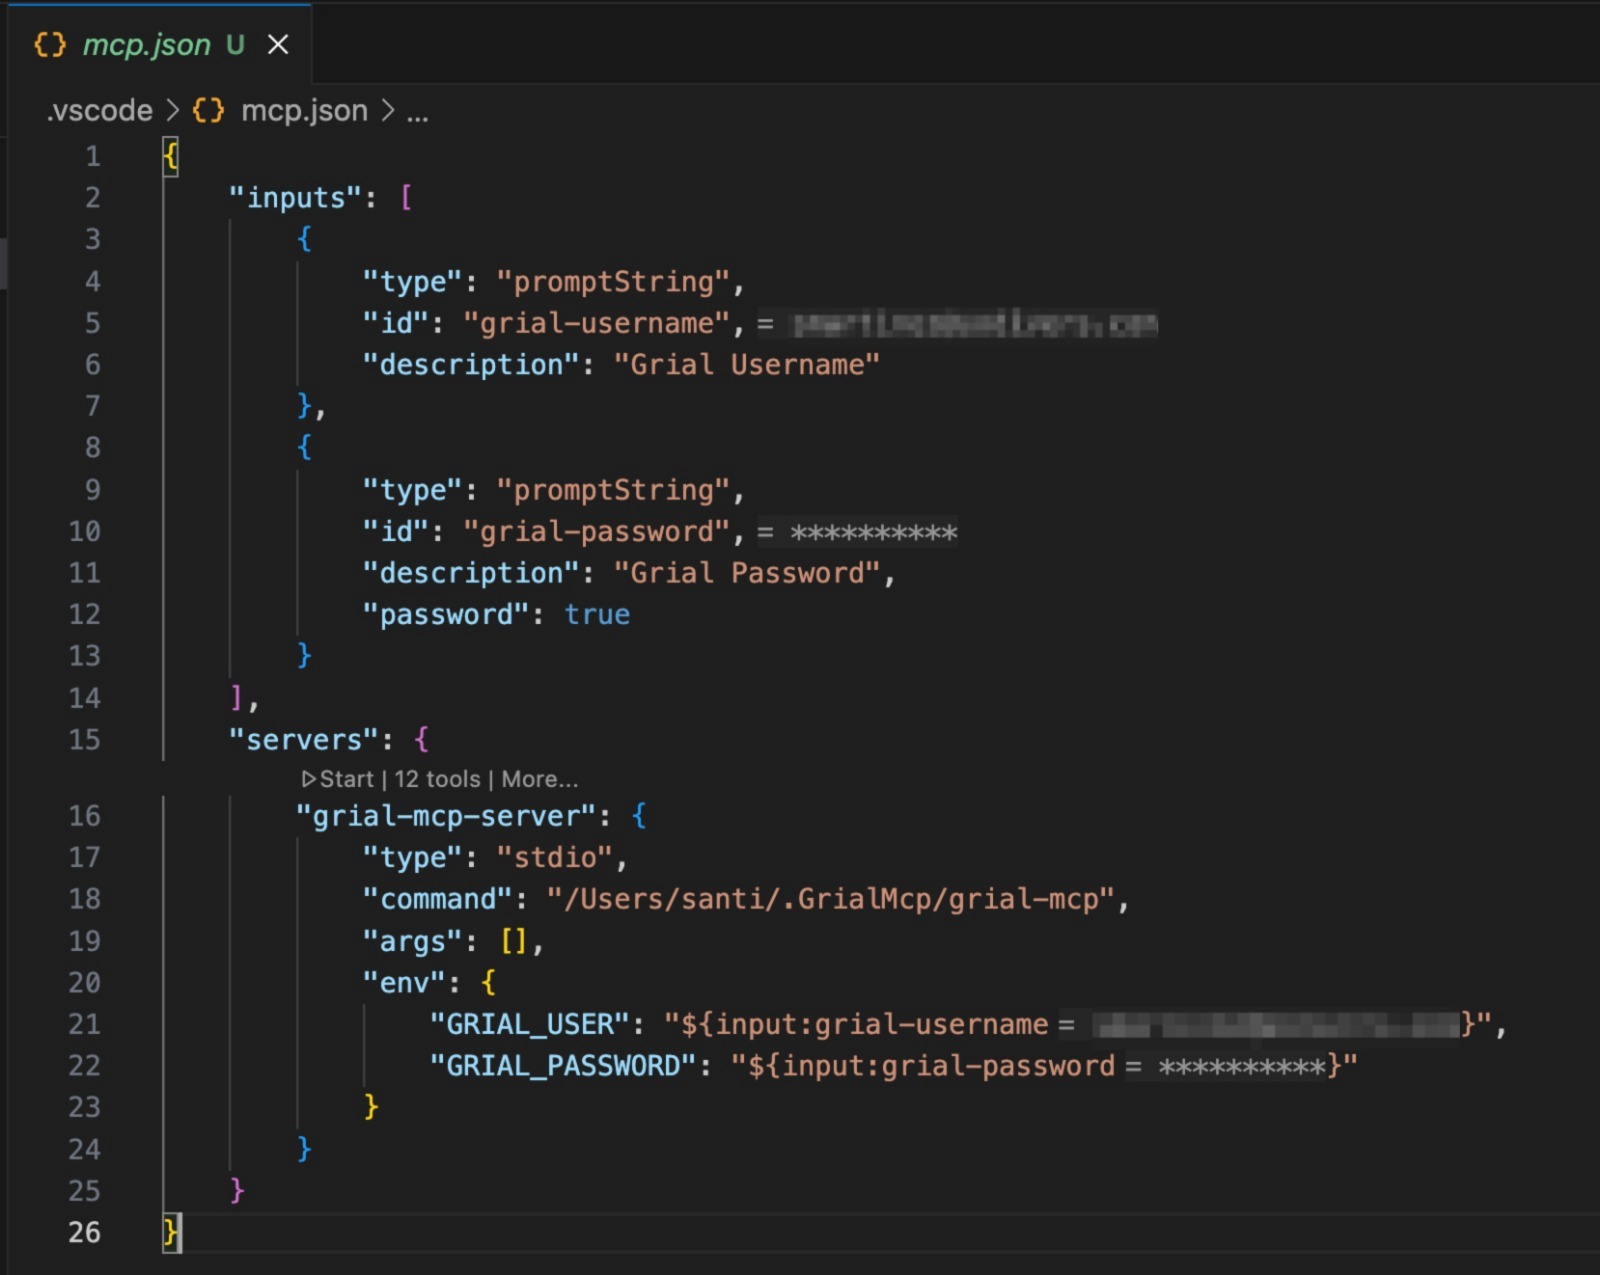
You’ll notice that, to start the server, the command runs an executable file. This file is also downloaded by the command and stored in ~/.GrialMcp.
This executable is our CLI tool, grial-mcp, which is responsible for manipulating your solution — it modifies your XAML, C#, and folders to add the templates and code snippets that you request using the Grial MCP.
The advantage of using this method is that adding templates and modifying your solution doesn't cost tokens. Also, since we perform the modifications with this tool, the result is deterministic — so 0% hallucinations, regardless of the LLM provider and model that you are using.
The mcp.json also defines two input fields: one for the email and another for the password. The values of these input fields are used as environment variables for the server to authenticate the user.
When you run the Grial MCP Server for the first time, the IDE will ask for your email and password of your Grial account. With this information, the server will authenticate requests to our services in order to download the templates into your solution.
Visual Studio
Everything from Visual Studio Code applies for Visual Studio, the key difference is that it is easier to install the extension, the only thing that you must do is to double click the .vsix installer file and select the visual studio version to install it.
First Steps
When you start working with a new workspace, the Grial MCP server needs to execute the configuration flow. This means creating a session that is going to save the setup parameters and the app linked to the workspace.
This does not save any information about your code or your .NET MAUI solution; it only stores information related to Grial.
If you want to check what the session has, you can go to the ~/.GrialMcp/sessions folder and check the files listed there. The name of the file indicates the workspace path — please don't change any information or the session could be corrupted.
Login
Once the mcp.json file is added or updated with the grial-mcp-server you can start it. Before it starts, a dialog will appear asking for a username; you must use your email and password from the Grial web admin portal. The login data will be saved, and the password will be hidden, as you can see in the mcp.json file.
Session Setup
The Grial MCP works with sessions. A session saves:
- the workspace path (the root directory of the workspace open in the IDE),
- the
project.csprojfile path, and - the
project.slnfile path.
The agent is going to execute the tool SetupServerSession with those 3 parameters. Please check that the paths are correct; if this step is wrong, the XAML tools are not going to work later.
Once the session is started, the tool will give your agent all the Grial apps that you have associated with your Grial account. If the agent doesn’t list them, please ask it to do it.
Linking an app
To work with the Grial MCP server you must have a Grial app associated to work with. You can choose among the apps in the list provided by the SetupServerSession tool, or you can ask the agent to create a new free app.
Optional: Creating a free app is a good way to test the capabilities of Grial or simply to avoid starting a .NET MAUI project from scratch. The agent should execute the tool CreateFreeApp with the app name; this function will return the app ID of the created app.
Once you choose the app that you want to work with, ask the agent to add that app to the session. The agent should call AddAppIdToSession with the app ID of the app that you chose.
Setup grial files
If the app linked to the session is not free, the MCP server is going to initialize the solution by calling the InitializeGrialSolution tool. This tool will download the License file and add the NuGet packages of Grial UI Kit.
Working with content
Once the session is ready, you can start working with the Grial MCP Server.
Listing available templates
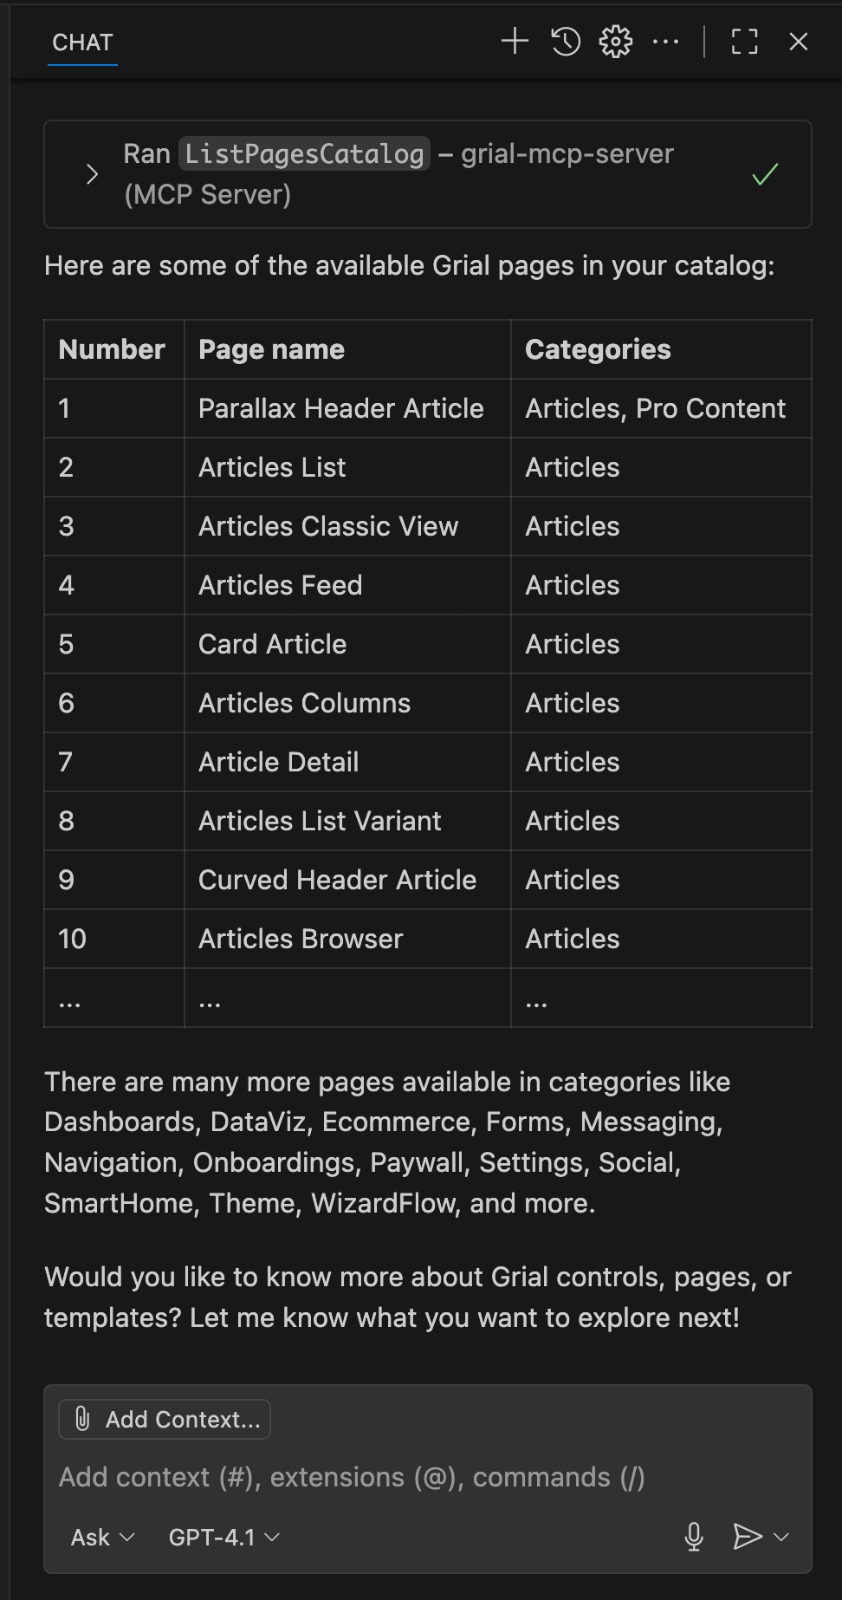
You can ask your agent to list the available Grial pages and that will execute the tool ListPagesCatalog. This tool will give the agent a JSON file with lots of information about templates, controls, pages, etc. The agent will probably show you a table with some template information.
At this point you can ask the agent any question about Grial. It can provide information about controls, pages, templates, and snippets of code. It has knowledge about the metadata of the pages, so you can ask for the best matches for an e-commerce or messaging app, for example.
Browse the catalog
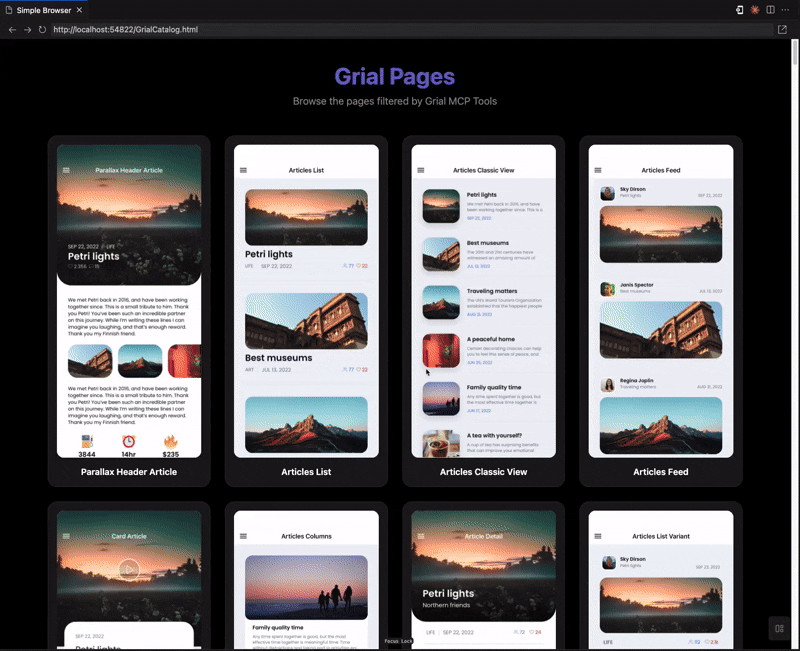
You can ask the agent to show you some pages using the Browser Catalog. This will display all the pages that you indicate to the agent in a beautiful grid. You can ask to display all the available pages, and the catalog can also be displayed inside VS Code.
The MCP tool that executes this flow is DisplayBrowserPagesCatalog. It receives a list of page IDs and will start an HTTP server that serves a page with the catalog. You can ask the agent to open the generated catalog page in the Simple Browser inside VS Code.
Adding content to the project
When you know which pages you want to add, you can say to the agent something like “Add these Grial pages to the solution…” and it will call the Grial MCP server tool AddScreensTool. This tool receives the page IDs as parameters to add to the project.
Also, the tool is going to add any other dependency that the page has with other Grial content — for example, if you are calling the function for the first time, the tool is probably going to add the main font, the icon font, some controls, the theme, example data, etc.
Since this tool uses our CLI tool, all these modifications are not going to consume tokens. All the assets are going to be downloaded from our servers and injected into the solution using Roslyn and other deterministic code tools. This ensures that everything works with the premium quality that Grial offers in its templates and code.
Now you should have all the selected pages, and all their related content, added to your solution. If you want to see the pages when you run the app, you must add navigation to them. However, if you are starting the project or you want to have an easy way to see all the added pages, you can add the EasyNavigation extension to your solution. You can see the guide here.